Julia looked at herself... and decided that she was not beautiful enough. I started to correct the situation with my teeth.
During quarantine, we did live broadcasts with different cool speakers - and I got involved. I loved this format.
But - surprise - because of these broadcasts I encountered new old problems. Again, I didn’t like the way I looked :) In this case, I looked on camera. I reviewed my “film” wardrobe (if you’re in black or white, the camera is “off-putting”, you need something neutral), I reviewed my makeup (my skin is too light, and the camera “offsets” again), now I’m making my face tone warmer, highlighting eyes more intense) and found points in the apartment where the lighting makes me happy.
But there was a problem that you couldn’t fix on your own. For example, yellowish teeth -).
I decided to take this very problem to dentist Gleb Pekli at his clinic Insmile Dental Lounge, which we have already written about and who is a doc, a pro and a specialist in this matter. At the end of June I went for a consultation. It wasn’t scary - it seems like I already know everything about whitening, I did it seven years ago. Well, almost not scary :)
This is what the teeth looked like when I showed Gleb:
Teeth before whitening
It seems not critical, but I remember how much I liked the color of my teeth seven years ago, just after that Philips Zoom whitening. I wanted to return that feeling.
General picture "before":
At the consultation, Gleb told me that I have a gray-yellow type of enamel. (There are three of them in total - white, a very rare white-blue and gray-yellow. Gray-yellow is characteristic of approximately 70% of the inhabitants of Russia). With this type, whitening with Philips Zoom alone will not be enough. To make your teeth as white as possible, after the procedure you need to use the Opalescenes home system. It is, of course, not as powerful as Zoom, but it works gradually, day after day.
What is photo teeth whitening?
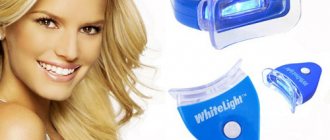
Many people know the meaning of the Greek word “photos”, so they guess that light is involved in photobleaching. But what role does he play? Maybe this will be a discovery for some, but teeth are “translucent” with the usual halogen, ultraviolet or LED lamps. Can they change the color of teeth? Obviously not. Photobleaching involves the use of a special gel with 30–35% hydrogen peroxide, the effect of which is enhanced by light, which significantly speeds up the bleaching process.
Professional methods for lightening tooth enamel
This group of methods includes photo and laser whitening, Magic White and Beyond enamel lightening, as well as Air Flow teeth cleaning and others. Their main advantage is that they are performed under the supervision of a doctor, are performed efficiently and guarantee longer-lasting results. If you follow all the specialist’s recommendations after the procedure, the result can be maintained for several years.
Laser enamel lightening
This is a professional method that not only makes teeth whiter, but also strengthens them. During the procedure, their structure does not change, the acid-base balance remains unchanged. The result is very strong - on average, lightening occurs by eight shades or more, and it lasts for five years or more.
During the procedure, a special gel based on hydrogen peroxide or urea is applied to the tooth surface, which is exposed to laser radiation that activates the whitening system. The components of the gel begin to disintegrate, atomic oxygen is released, which, being a strong oxidizing agent, destroys color pigments that cause undesirable coloring. As a result, teeth become whiter, the enamel thickens by an average of 30-40%, and bacteria are also destroyed. Photos of teeth before and after laser whitening are shown below.
Teeth whitening Zoom
This is a progressive technique for changing the shade of tooth enamel, which is widely used throughout the world. A gel based on 25 percent hydrogen peroxide is applied to the teeth and treated with light from a special Zoom lamp. The peroxide decomposes, oxygen atoms are released, destroying the coloring pigments. Upon completion, the enamel becomes 8-12 shades lighter, as can be seen below in the photos before and after Zoom whitening. It is worth noting that, unlike laser, this method does not strengthen the enamel, but it is slightly cheaper in cost.
Enamel lightening Beyond Polus
During the procedure, the doctor applies a proprietary gel to the teeth and treats it with a special cold light lamp. The gel begins to release atomic oxygen, and a change in shade occurs. The photos before and after the Beyond Polus procedure show that the teeth become significantly lighter – by an average of 8-10 shades. Upon completion, they are coated with a fluorine-containing compound to strengthen the structure. The advantage of a cold light lamp is that burns to the soft tissues of the oral cavity are excluded, because the lamp practically does not emit ultraviolet and infrared radiation.
Magic White
In just 21 minutes, this method will make your teeth 4-8 shades lighter. It differs in that it uses 0.1% carbamide peroxide rather than hydrogen peroxide. The procedure is absolutely painless and does not cause increased sensitivity. In the photos below you can see the results before and after teeth whitening using the Magic White method.
The results last for several months, not years, but following a special white diet will help delay the next procedure. The cost of this method is significantly lower than those described.
Air Flow Cleaning
This technique does not involve the use of any oxidizing agents, as in previous methods. It serves to remove plaque and age spots from the surface of the teeth. To do this, they are exposed to a powerful jet of an abrasive agent (fine soda powder) with air.
Despite the fact that the result is up to four to six tones, as can be seen in the photo before and after Air Flow whitening, its undoubted advantage is the absence of increased sensitivity, as well as the pleasant smoothness of the surface of the teeth due to soft grinding with soda. In addition, this is the only method suitable for processing artificial inserts (veneers, fillings, crowns) and does not require a remineralization course.
How does photo teeth whitening work?
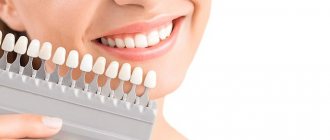
One photo-bleaching session takes about an hour. First, the dentist determines the color of the patient's teeth using a standardized VITA scale. He then places a buccal retractor, which allows for better access to the dental arches. A special protective composition is applied to the gums, and a whitening gel is applied to the teeth. Then both dental arches are irradiated with a lamp for 15 to 30 minutes. After this, the “spent” gel is washed off, and, if necessary, a new layer is applied to the enamel, and the procedure is repeated. If the patient is dissatisfied with the newly acquired color of the teeth or wants to enhance the result obtained, then he may be recommended to repeat the photo-whitening procedure or additionally use a home whitening system.
Chemical bleaching
Chemical teeth whitening is considered one of the effective methods for obtaining a snow-white smile . However, this method is not suitable for everyone. The teeth are covered with gel for 15-60 minutes. This method is used only on healthy teeth, without any external defects (cracks, chips, carious lesions, etc.). This procedure must be carried out in a dental office, otherwise the result may not only be ineffective, but also traumatic for tooth enamel.
pros
- Affordable price;
- High efficiency.
Minuses
- Sensitivity of teeth after treatment;
- There is a possibility of obtaining an uneven shade;
- Less predictable result; it is not always possible to achieve the desired result.
Efficiency of photobleaching
You can usually whiten your teeth several shades. But the results of whitening, as well as its durability, regardless of the technique, are always individual. In many ways, the achieved effect depends on the natural shade of the teeth and the reasons for its change. For example, yellow teeth are more susceptible to lightening than gray teeth. A coffee or cigarette lover will be more likely to be satisfied with the results obtained, but someone with tetracycline teeth or fluorosis will probably waste their time and money. Therefore, if you are interested in the issue of effectiveness, then reviews from friends and colleagues about photo teeth whitening are unlikely to be useful to you. “I want teeth whiter than my girlfriend’s!” – You shouldn’t make such a request even to the best specialist. If you need a guaranteed result, it makes sense to think about installing lumineers, which quite effectively solve the problem of yellow teeth.
Photos before and after using home teeth whitening techniques
You can make your teeth brighter and more attractive without visiting a professional dentist’s office and without spending heavily on expensive procedures. There are several remedies that are used at home and give good results. These include teeth whitening strips, pencils and trays. All photos are taken from the largest review portal irecommend.ru. You can read there people's opinions about certain teeth whitening products to decide on the choice that is most suitable for yourself.
Dental strips Crest
The principle of their action is based on the same hydrogen peroxide, which is included in their composition. You take out the strips from the kit, apply them to your teeth and hold them for a certain time, according to the instructions. The procedure is very convenient because it can be performed anywhere and at any time. The effect of Crest whitening strips is not as strong as we would like, but in the photo before and after using them, the result is still noticeable. You are guaranteed to lighten the enamel by two to four tones.
Pencils for teeth
Another small miracle for those who want to make their smile beautiful. To do this, you should buy a small pencil. It will have an applicator or brush at the end. The bottle of the product is filled with carbamide peroxide. All you need to do is apply the gel to your teeth and leave it on for a while. Urea breaks down and begins to release oxygen atoms, which destroy the coloring pigments on the teeth, causing the latter to become lighter.
Trays for enamel whitening
The essence of this product is to wear a nozzle filled with gel (based on hydrogen peroxide or urea). You just need to fill the tray with gel, place it on your teeth and apply a little pressure to distribute the product evenly. After a certain time, the nozzle should be removed and the mouth should be rinsed thoroughly with water. You’re unlikely to use this product when you’re away, but at home it’s just the thing. Using teeth whitening trays, you can expect to lighten your enamel by two to four shades. The results of their use can be seen in the photo before and after their use.
This is where we will probably finish our short review of photographs of the results of using certain techniques. We looked at the cost of teeth whitening with them earlier. Choose a suitable method based on efficiency and price and enjoy a Hollywood smile, and also give it to others more often!
